Lookups
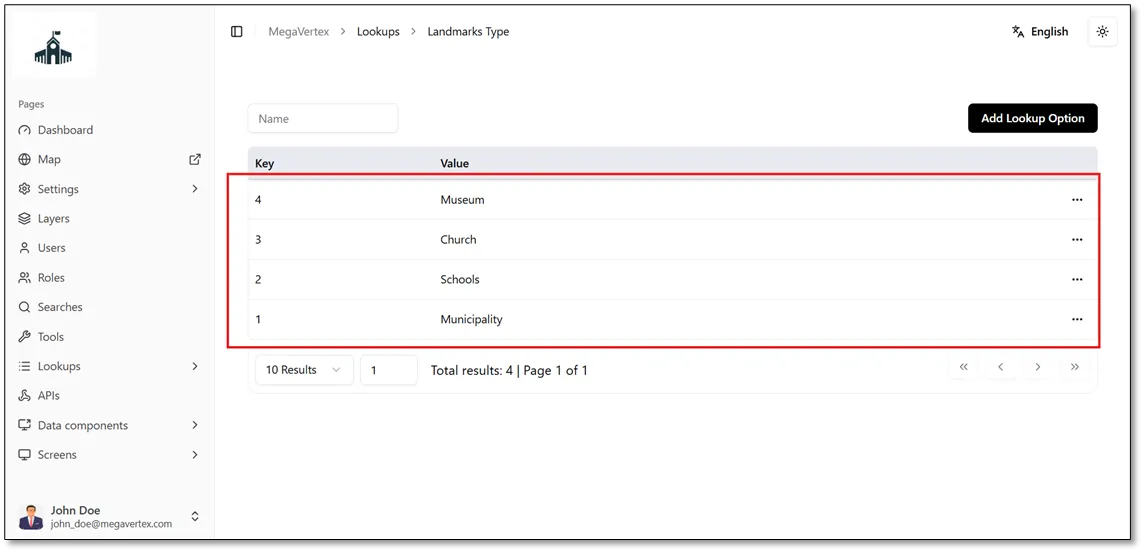
When a layer contains multiple categories, such as a Landmarks layer with a Landmark Type field specifying categories like churches, museums, and municipalities, the recommended approach for managing this data is to use Lookups. This technique assigns a unique code to each category, as shown in the figure below.
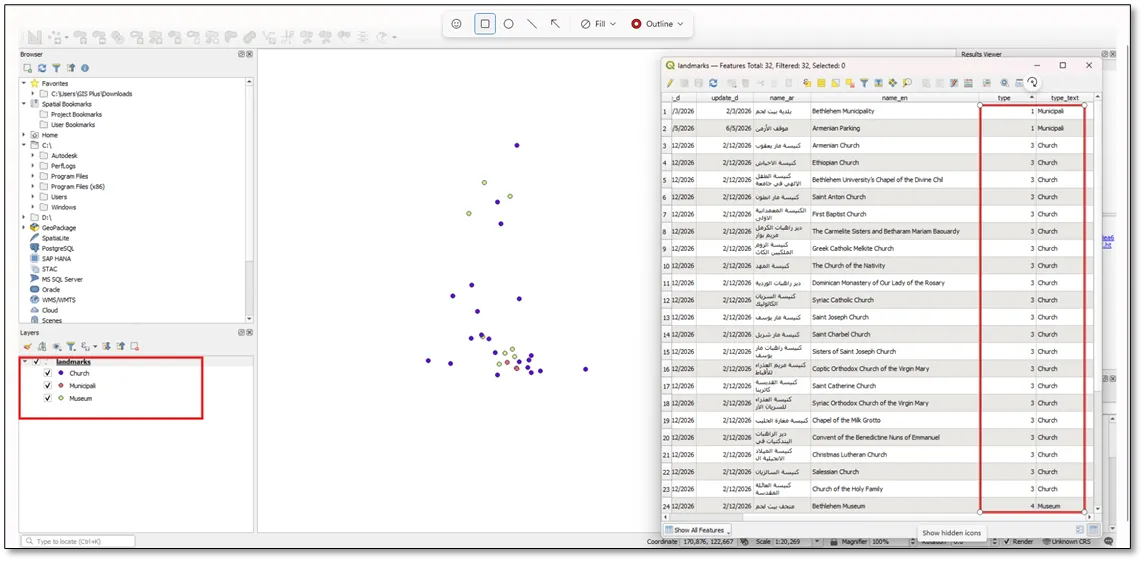
Using Lookups simplifies data entry and categorization while reducing errors. This feature allows you to define predefined categories for layers, ensuring that data is entered consistently and accurately according to the specified types.
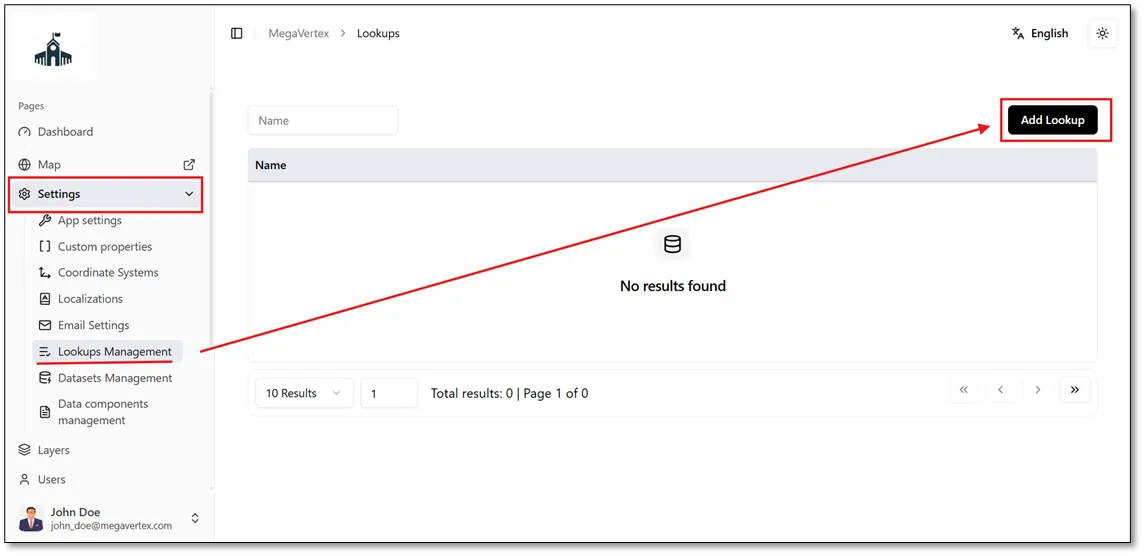
To create a lookup, follow these steps:
Navigate to the Settings page, select Lookups Management  , and then click Add Lookup, as shown in the figure below.
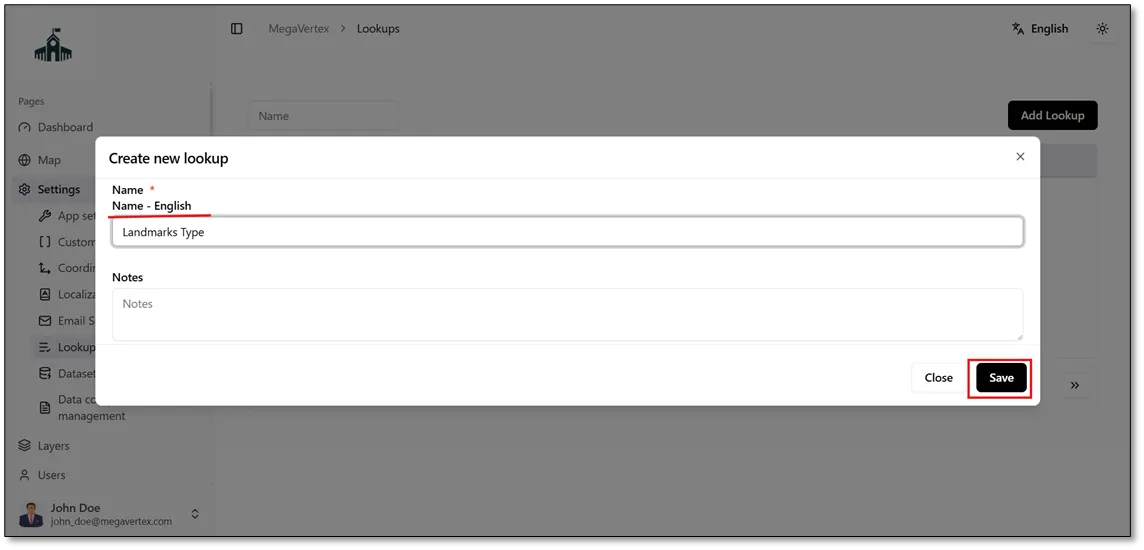
When you click Add Lookup, the Create New Lookup form opens. Enter the lookup name in the local language, then click Save to create the lookup, as shown in the figure below.
After clicking Save, the newly created Landmark Type lookup will appear in the list of lookups on the Lookups page. A submenu arrow will also appear next to the Lookups menu, as shown in the figure below.
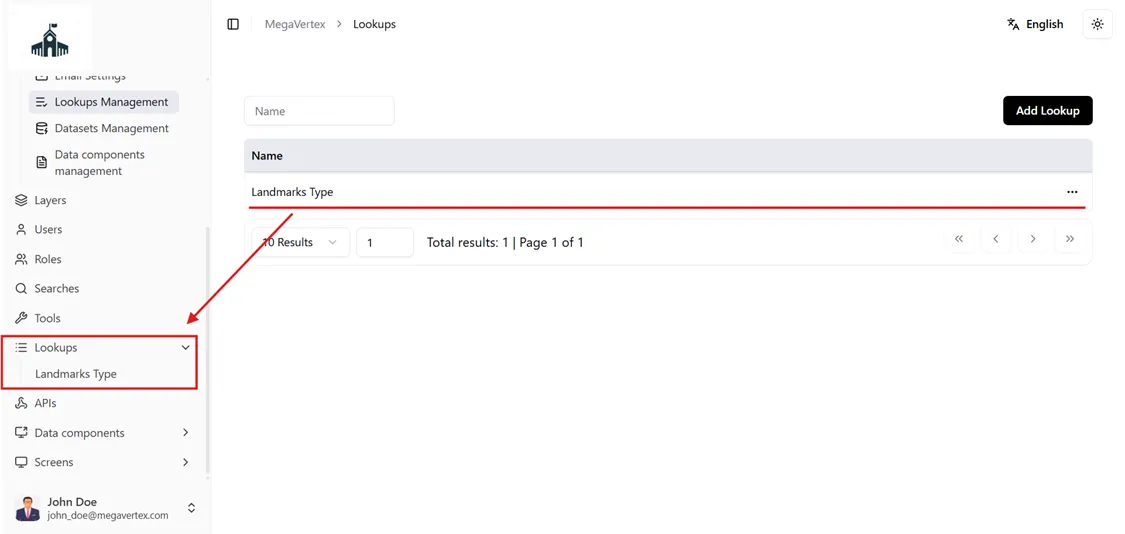
From the Lookups menu, select the Landmark Type lookup, then click Add Lookup Option to add new lookup values, as shown in the figure below.
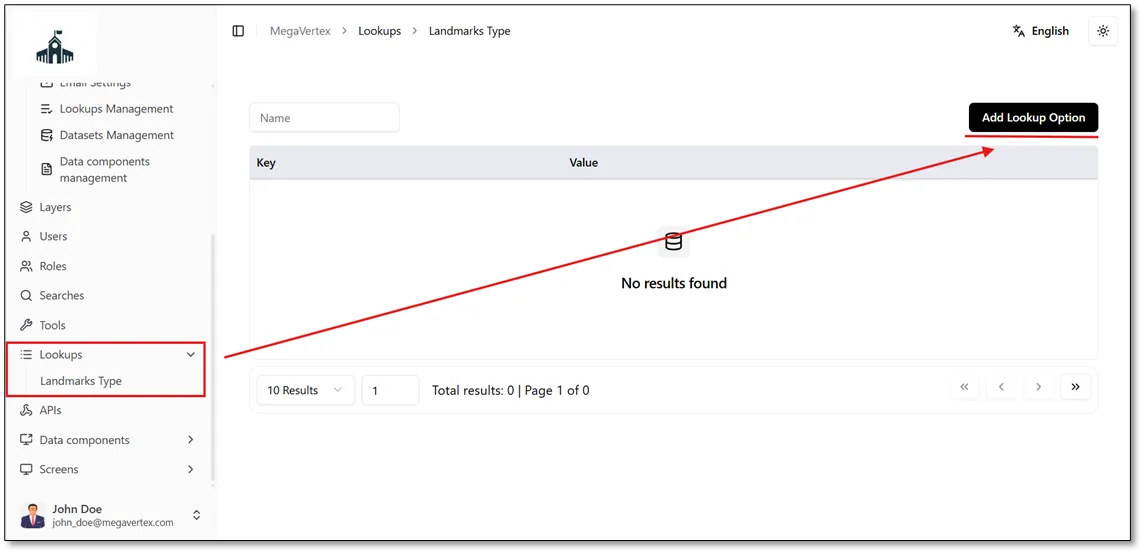
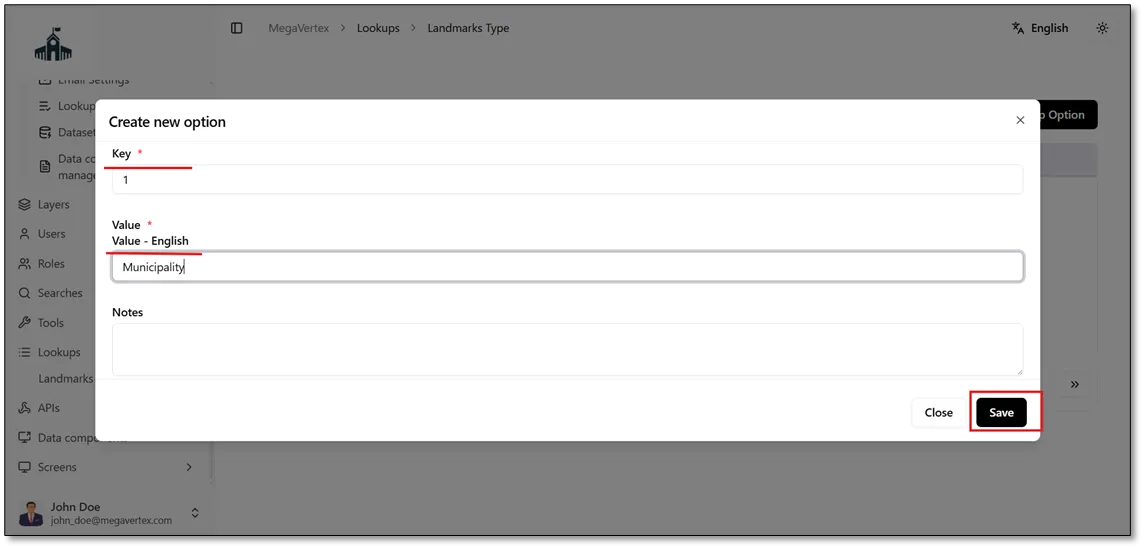
When you click Add Lookup, the Create New Option form opens. Enter the category key and category value in the local language, then click Save to add the new option, as shown in the figure below.
As shown in the Landmark Type lookup list, the category Municipality has been assigned the code value 1.
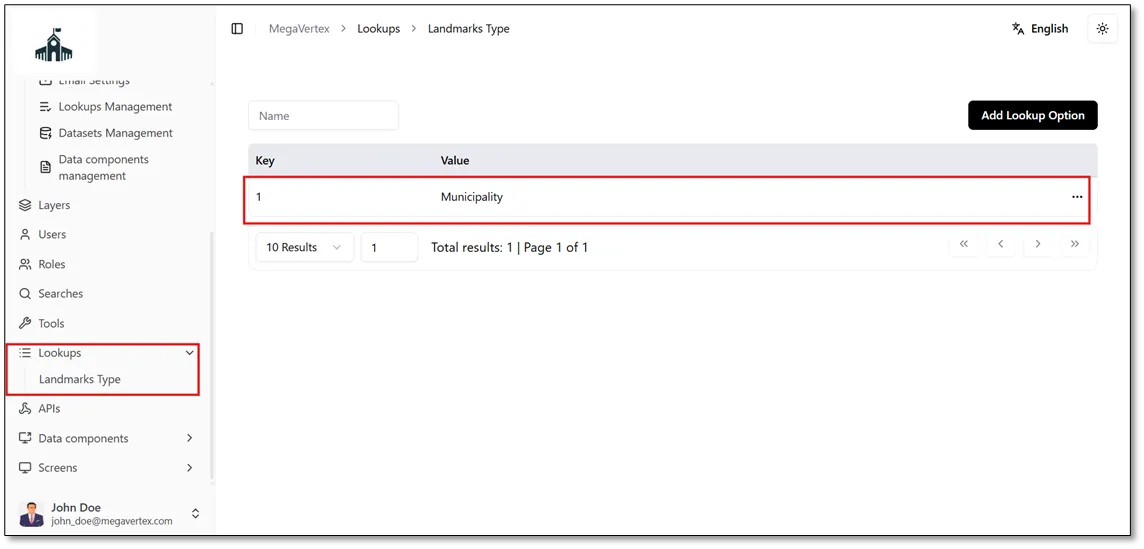
Repeat the same steps using the Add Lookup option to add additional lookup categories as needed.
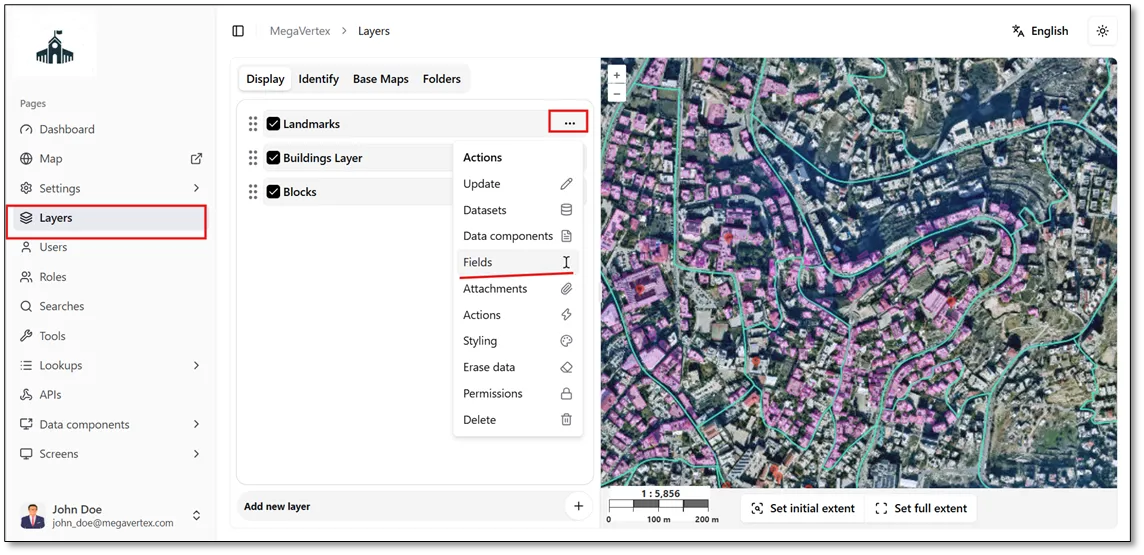
Navigate to the Layers page, click the Actions button  next to the desired layer, and select Fields
 , as shown in the figure below.
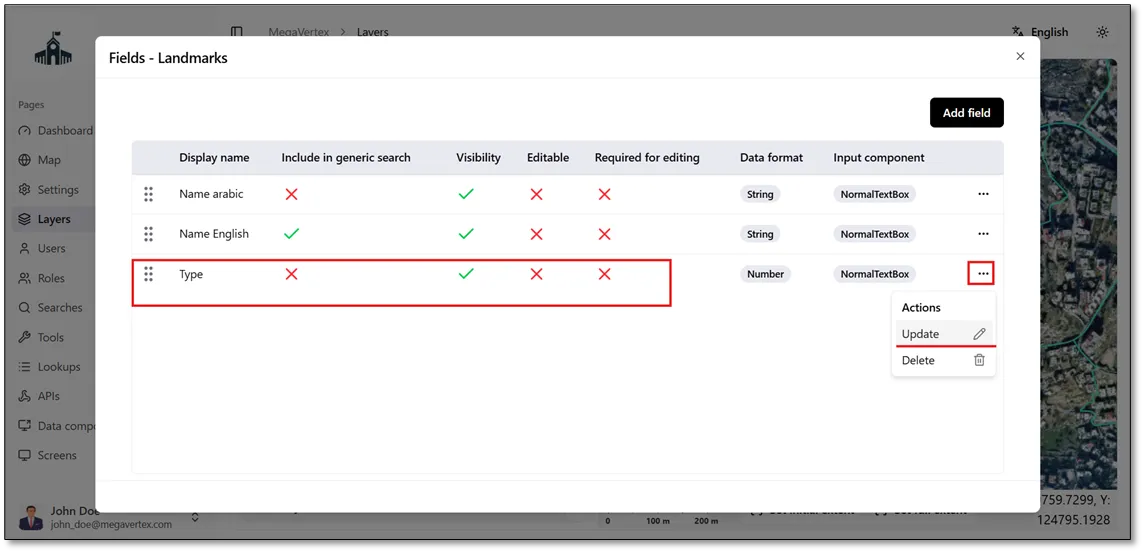
Click the Actions button  next to the Type field, then select Update, as shown in the figure below.
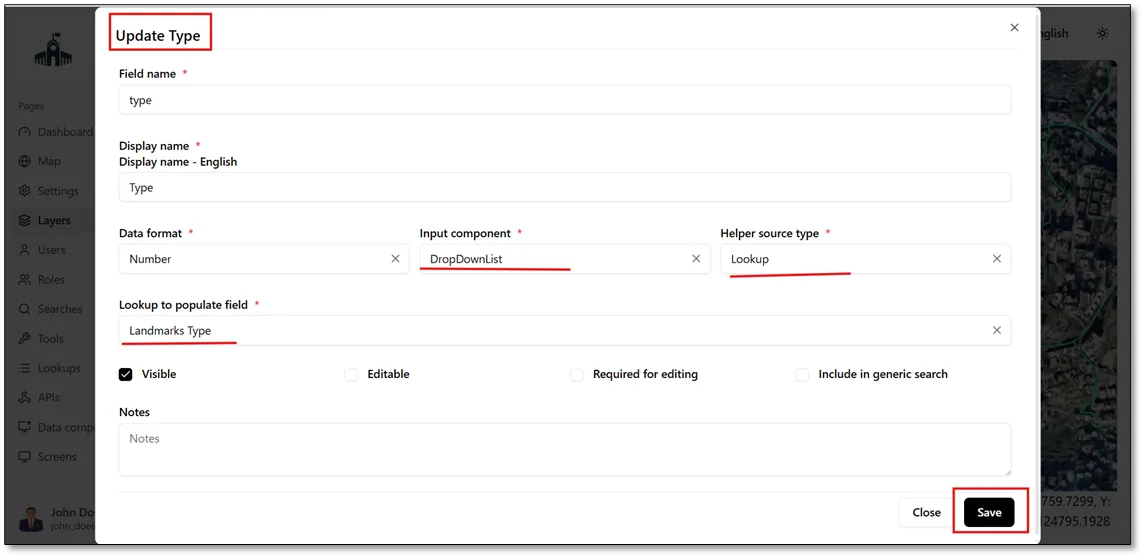
In the Update Type form for the Landmarks layer, set the Input Component to Drop-down List. Then, set the Helper Source Type to Lookup and select Landmark Type as the lookup source to populate the field, as shown in the figure below.
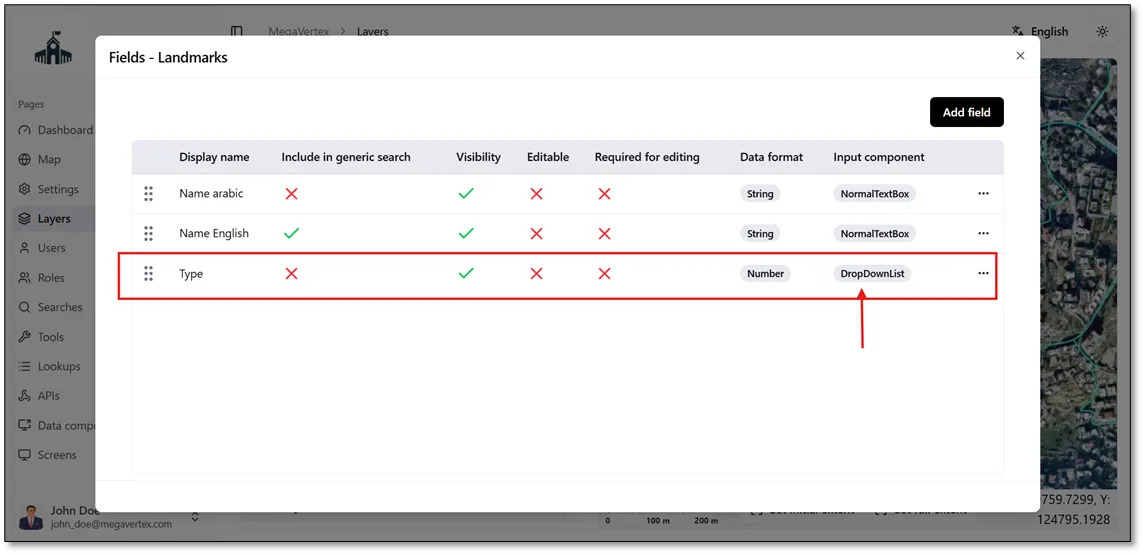
After updating the Type field settings, the Input Component is displayed as a Drop-down List, as shown in the figure below.
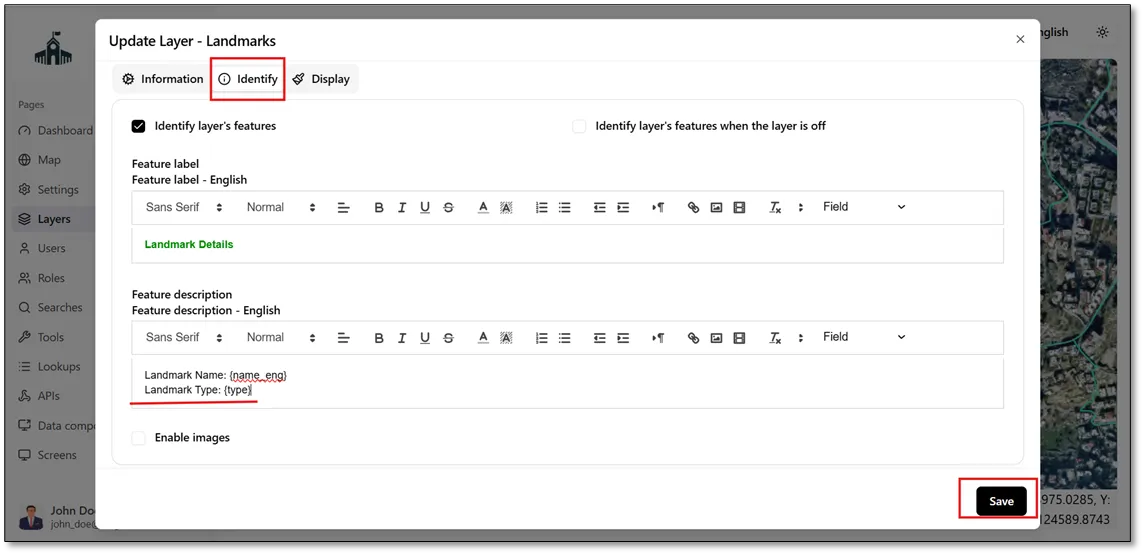
In the Identify tab, select the checkbox  next to Identify Layer’s Features. Then, enter the feature label and description in the local language, as shown in the figure below.
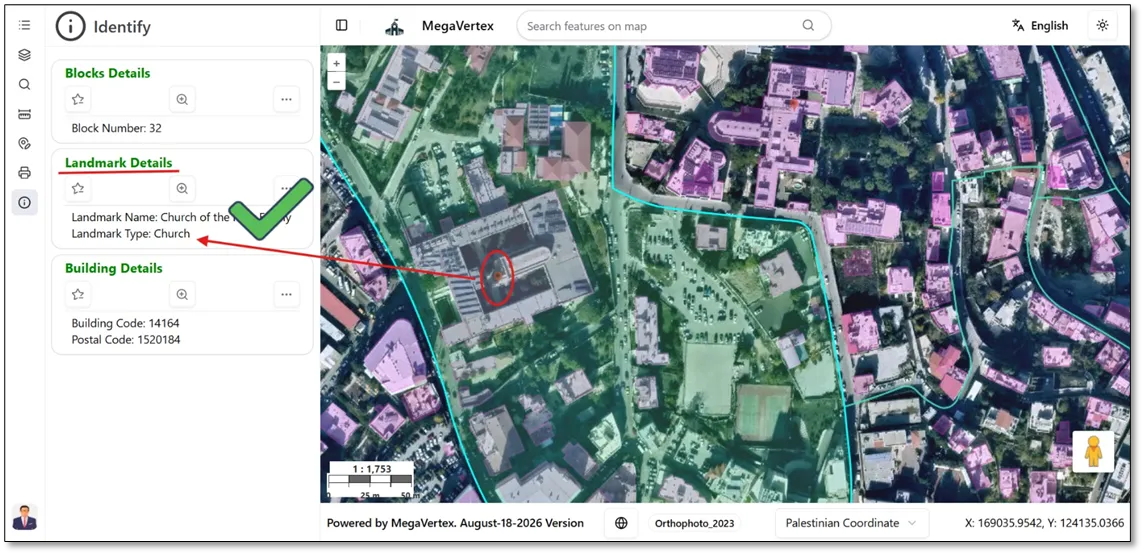
When you navigate to the Map and select a landmark, the identification panel will display the landmark’s type, as shown in the figure below.