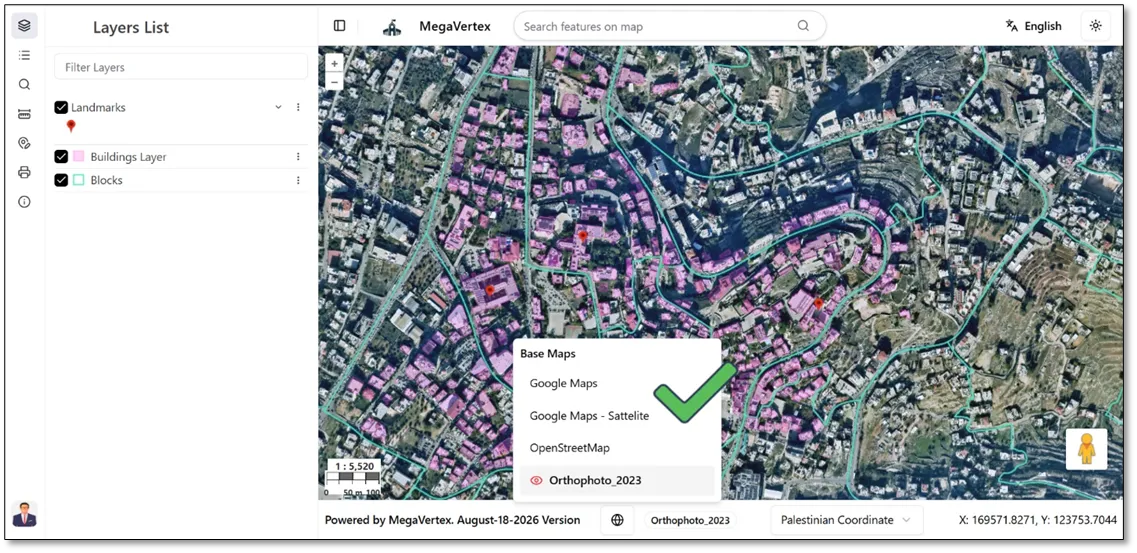
Add Basemap Layer
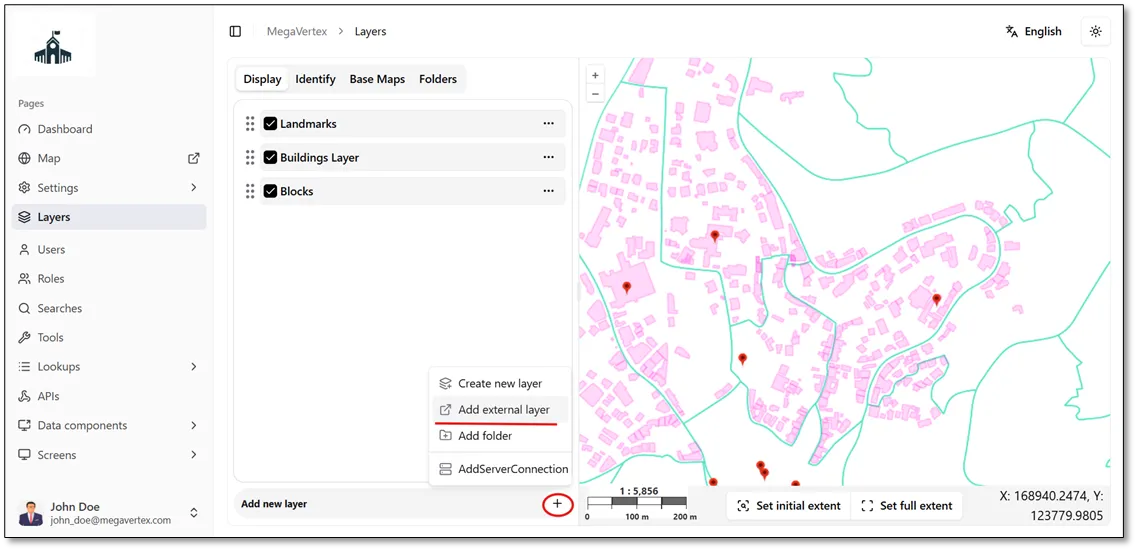
To add a basemap layer, navigate to the Layers page and click Add New Layer at the bottom of the page. Then, select Add External Layer, as shown in the figure below.
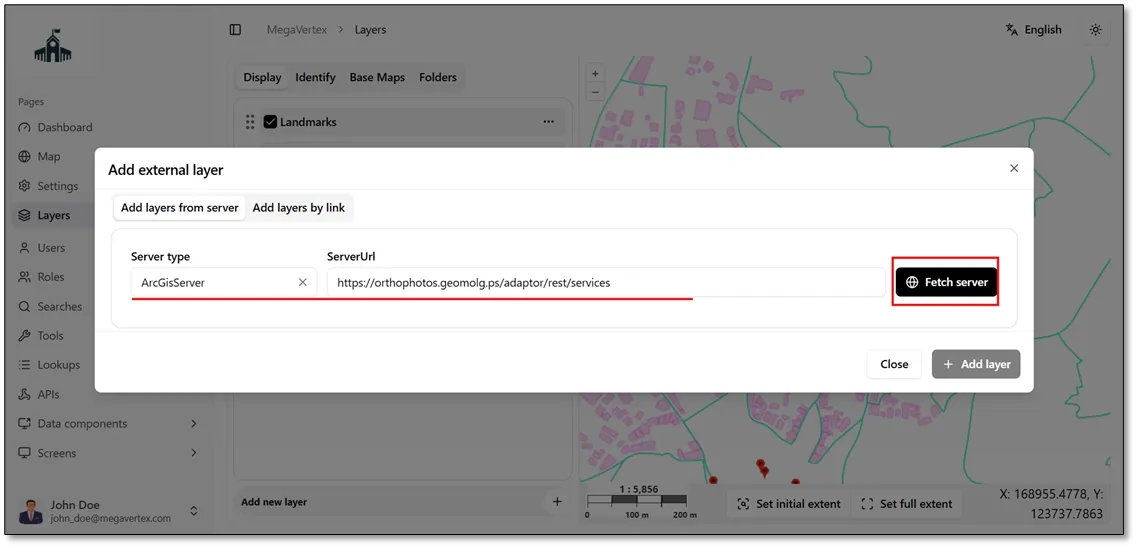
Select the required Server Type, then enter the Server URL in the designated field. Click Fetch Server to retrieve the available services. The example below illustrates how to add a map service from an ArcGIS Server.
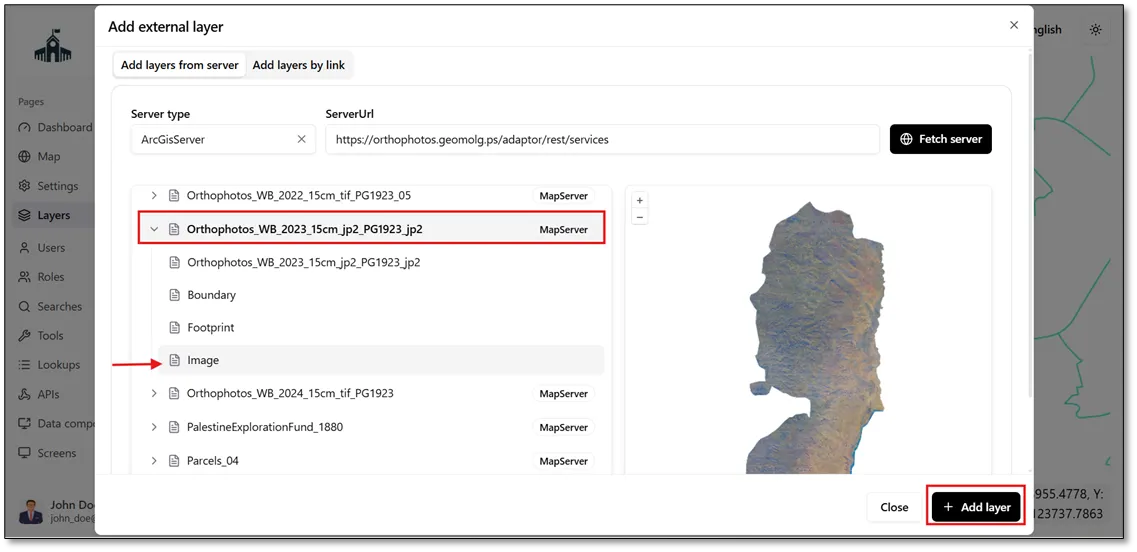
Select the desired map service from the list of available services, then click on the corresponding layer. Finally, click Add Layer to add the selected layer to the application, as shown in the figure below.
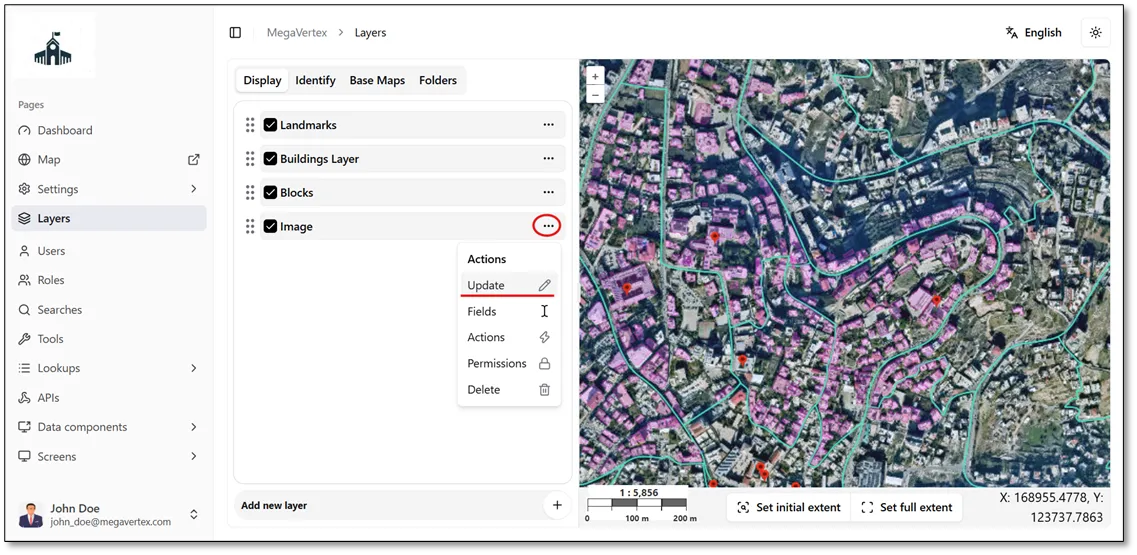
After adding the layer, locate it in the layer list. To change its name, click the Actions button  next to the layer, then select Update
 , as shown in the figure below.
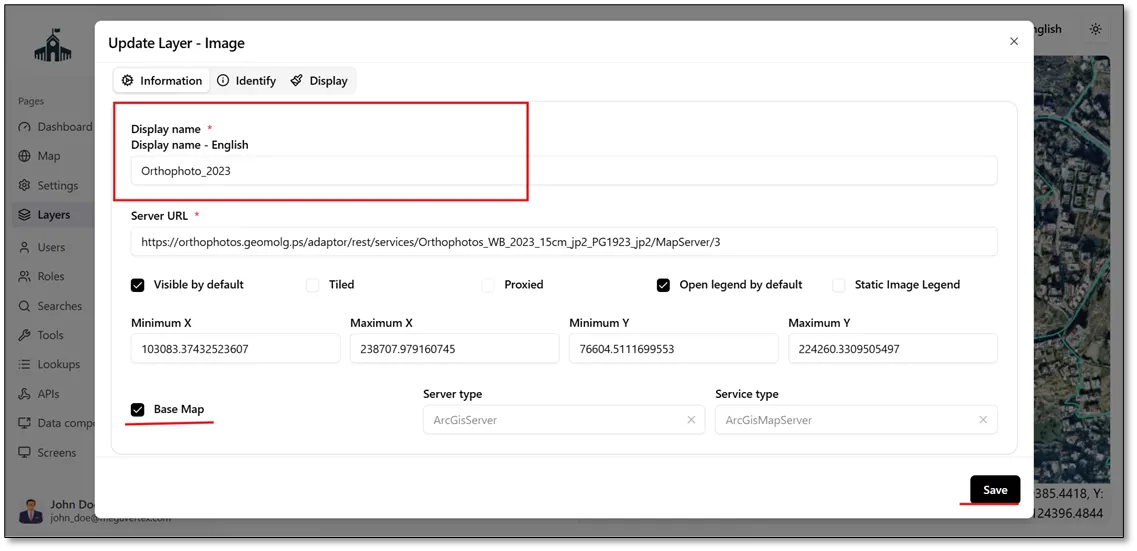
In the Update Layer form, change the Display Name to the desired name, then check the Base Map checkbox to designate the layer as a basemap. Finally, click Save to apply the changes, as shown in the figure below.
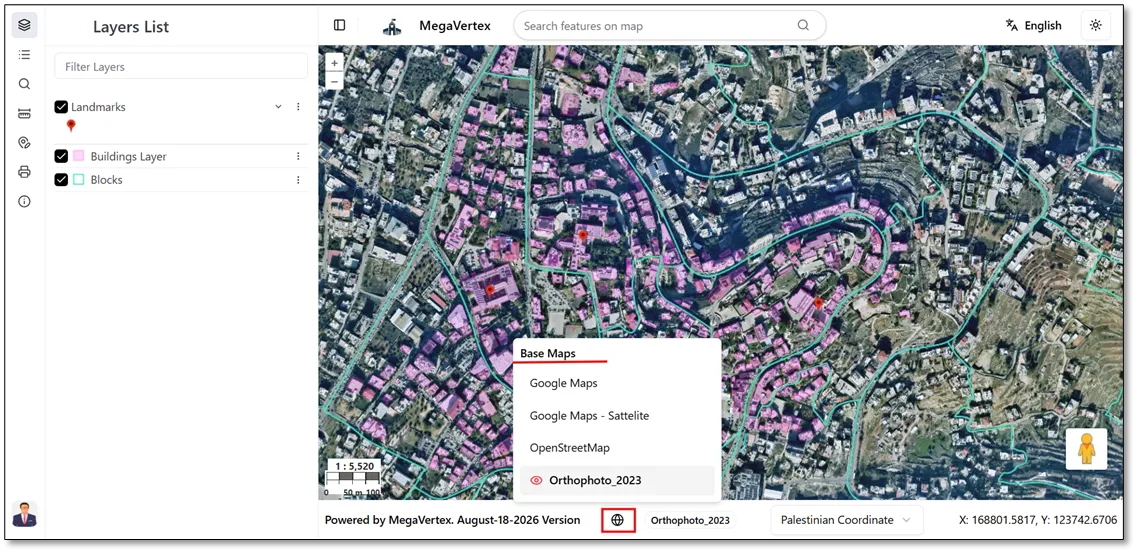
Navigate to the Map page. To switch between the available basemaps, click the Basemap button  , as shown in the figure below.
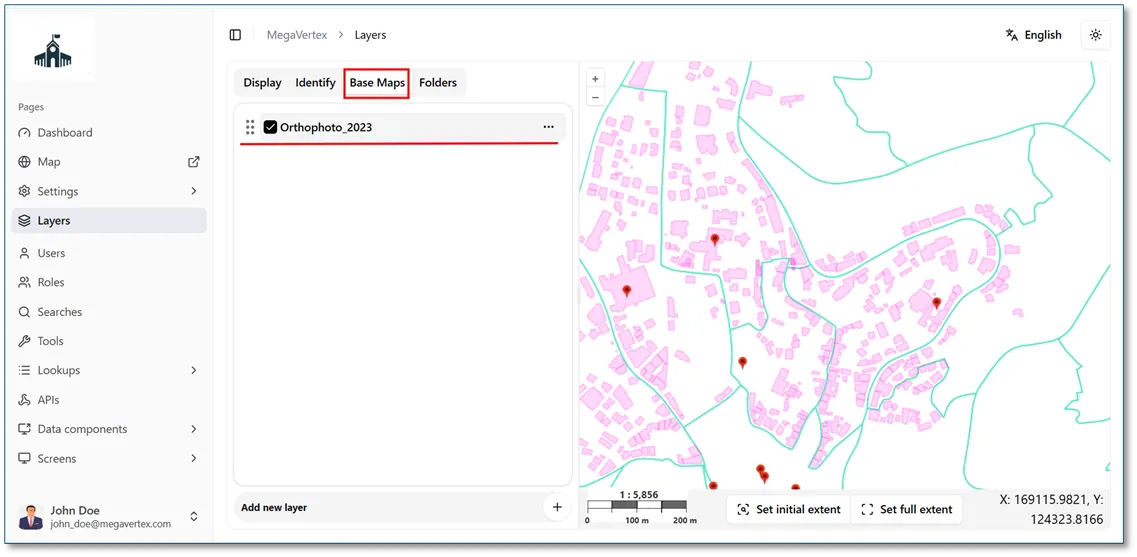
You can manage the layers designated as basemaps by navigating to the Base Maps tab, where you can view and configure the available basemaps.
Navigate to the Map page and click the Basemap button  at the bottom of the screen. A list of available basemaps will appear, including the newly added basemap, as shown in the figure below.